Sprucing Up Your Online Portfolio with Jekyll
Sprucing up your Portfolio/Blog
I've had this blog for sometime now. While it was a great way to get a website up using the free options available at with Github pages, I didn't really look into it as much as I should have. I found a good tutorial, forked over some files and made some customizations. I will probably write a tutorial on how to create a basic one as well. It's a great start, but its not really something I created on my own. I wanted to really create something myself and customize it the way I envision.
My original site used the Jekyll Theme Minimal Mistakes (see link below). Forking over was a great start but I really wanted to make some customizations.
I went over to Jekyll's Website to get more information on installing Jekyll. I am a windows user by the way and this was not a simple task.
In order to install Jekyll, you need Ruby version 2.5 for higher, RubyGems, GCC and Make. Ruby comes pre installed in Linux and iOS but not in Windows. In order to see which ones I had installed I went into my command prompt (using Git Bash for me) and entered the following commands which produced the results following each command
$ ruby -v
bash: ruby: command not found

$ gem -v
bash: gem: command not found

$ gcc -v
bash: gcc: command not found

$ g++ -v
bash: g++: command not found

$ make -v
bash: make: command not found
Of course I didn't have any of those and needed to install each one
Ruby Installation
I first began by installing Ruby. In order to do this for windows, I went to the RubyInstaller for Windows site (link below). At the time of writing this, they recommended Ruby+Devkit 2.6.X (X64) so I downloaded the 2.6.6-1 version. I installed it and selected MSYS2 development toolchain as well. After installation, I was ready to go!
Download and Install RubyGems
This was a lot simpler to do. First I restarted my Git bash and confirmed that Ruby was installed:
$ ruby -v
ruby 2.6.6p146 (2020-03-31 revision 67876) [x64-mingw32]
Next I entered the following command to download and install RubyGems
$ gem update --system
Once installation was complete, I entered the following to confirm installation
$ gem -v
3.1.4
Downloading and Installing GCC and Make
GCC is a C code compiler (GNU Compiler Collection). For Windows I needed to download and install the MinGW C compiler located at the official MinGW website (link below). In the downloads section of their website you can download the setup file mingw-get-setup.exe Once it has been downloaded you can run the set up.
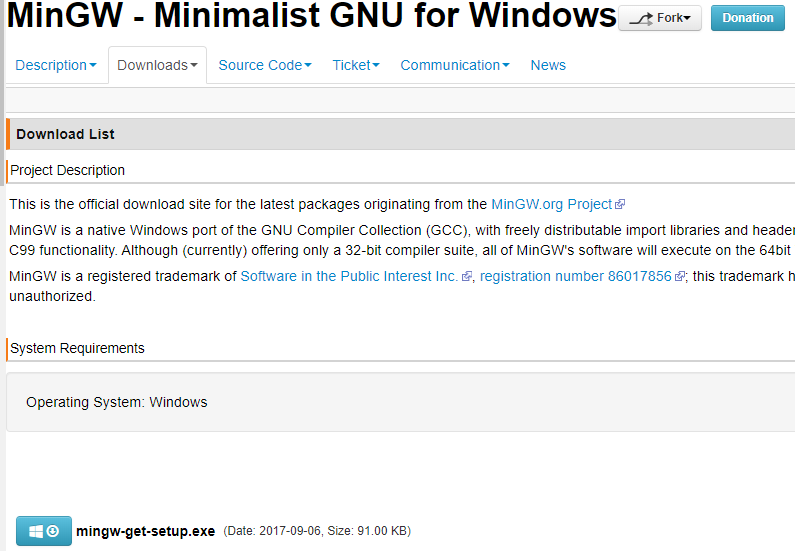
Open the file and click on the Install Button.
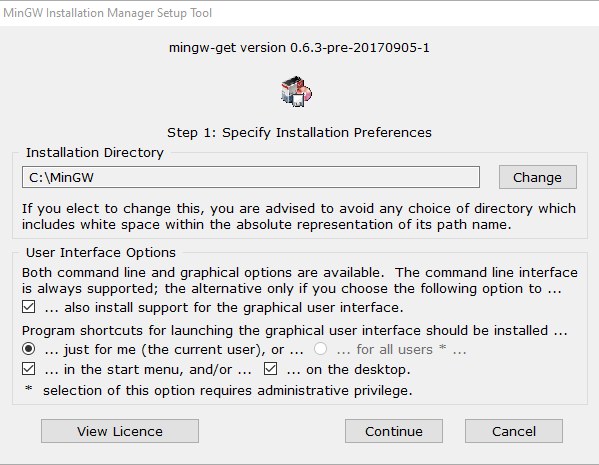
At the next step you are given the installation directory as well as some interface options. Since I am new to MinGW, at this time I had no reason to stray away from the default settings so I clicked continue.
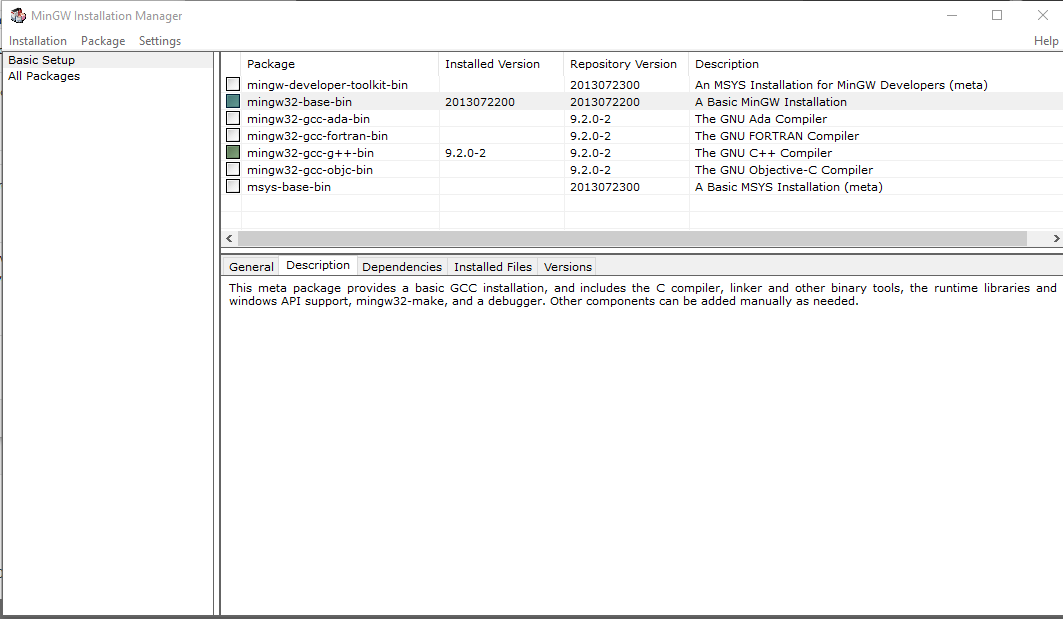
The installer will download some files and take you to the installation manager. At the installation manager, select mingw32-base-bin as well as mingw32-gcc-g++-bin by right clicking each one and selecting Mark for installation. Once they have been selected, go to the menu on the top left section and click on Installation and select Apply Changes.
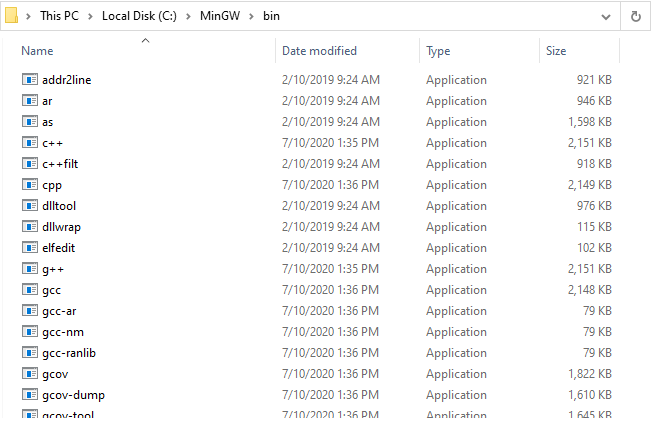
Once the installation is completed, open an explorer window into your C drive. You will see a folder for MinGW confirming that it has been installed. If you go into the folder and then the bin folder, you will see your compliers that have been installed. Although the compiler has been installed, it has not been set up yet.
In order to be able to execute the compiler form your command prompt we need to update the path variable. Go into your windows search bar and type in variable and select "edit the system environment variables" once it appears. This will bring up the system properties window.
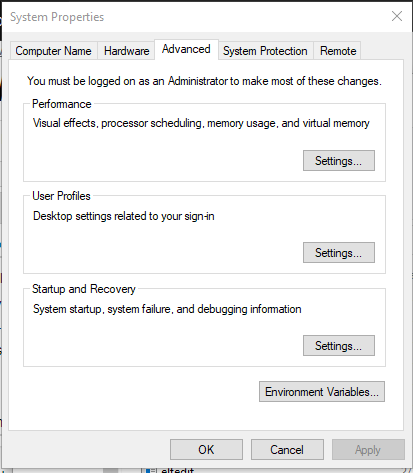
Select the Advanced Tab and click on Environment Variables. This will open the Environment Variables window.

In the bottom section you will see a list of System variables. Click on the Path entry and click on the edit button to add a new path for MinGW.
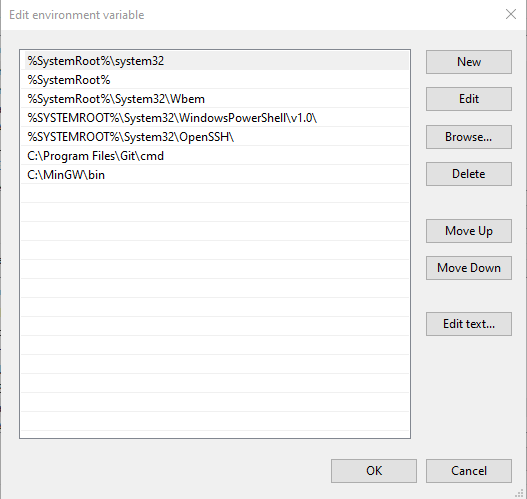
Click on New and enter the location of your MinGW bin folder. If you used the default installation, this should be "C:\MinGW\bin". In order to apply these changes, Click on the Ok button to close the edit window, Ok to close the Environment Variables window, and then Ok in the System Properties window. This will set up your GCC and G++ but we still have to finish setting up MAKE.
Go back into your MinGW bin folder (C:\MinGW\bin) and look for a file named mingw32-make. Right click on the file to make a copy and paste it into your folder, the copy should be named mingw32-make- Copy. Right click the copy and rename it "make".
Now restart your git bash and confirm the installations by typing in the code below:
$ gcc -v
gcc version 9.2.0 (MinGW.org GCC Build-2)

$ g++ -v
gcc version 9.2.0 (MinGW.org GCC Build-2)

$ make -v
GNU Make 3.82.90
Install Jekyll
Next we install Jekyll using the command (the install will take a few minutes)
gem install jekyll bundler
and test that you have the latest version and you’re ready!
jekyll -v
4.1.1
Start Up A Test Site
Now to get your new site started!
Open up your Git Bash and type in the following commands. This will create a new jekyll project folder (test-site), and then change your directory to this new folder
$ jekyll new test-site
$ cd test-site
The bundle installer will take awhile to run and install.
Now you are ready to open up your site.
$ jekyll serve
    Server address: http://XXX.X.X.X:4000/
  Server running... press ctrl-c to stop.
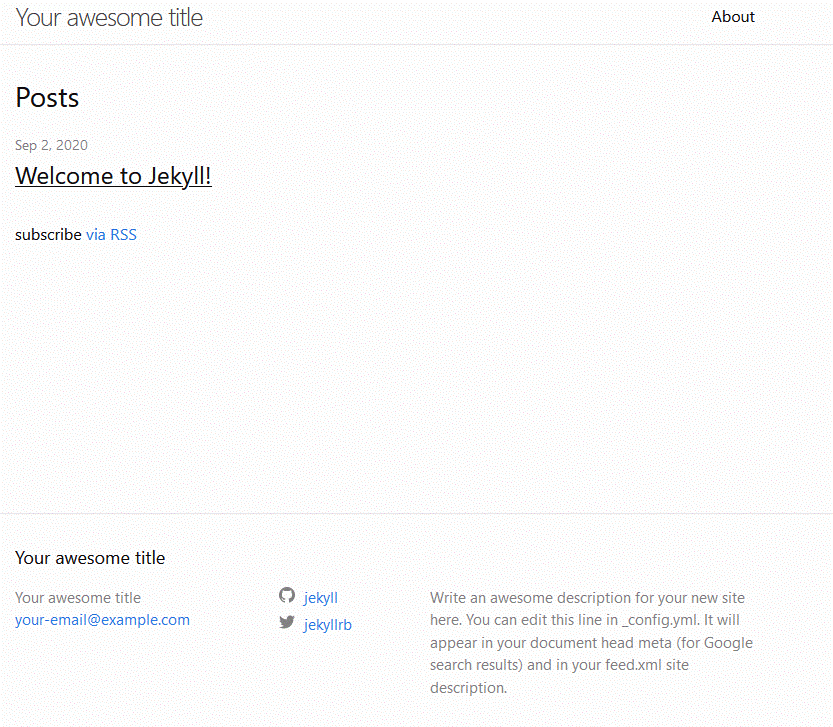
This will take a few seconds to generate your site. Once that is done open your web browser and type in localhost:4000 into the address bar to start up a local version of your website.
You now have your test site!
Update Your Actual Blog/Portfolio
Now that you have Ruby and Jekyll installed you can really start experimenting with your blog/portfolio. I recommend making a copy of your existing blog folder as your "testing area". Maybe name it I just added "-testing" to the name of the copy to differentiate from the original.
I recommend reading up on Jekyll and Ruby before continuing but you can now install new themes and begin playing around with the layout of your site. Sky's the limit!


