Using BIND 9 to get DIG commands in Windows 11
Dig command not working for Windows 11 command prompts
I recently acquired a custom domain name for my Github page. As part of the process, Github recommends that you verify you custom domain so that only repos owned by your account can be used to publish a GitHub Page site to the custom domain or the domain’s subdomains. You definitely don’t want someone else to be able to publish to your domain! Everything was going fine for me until I got to step 6 of their instructions which is where you confirm your DNS changes by running a dig command in your command prompt.
$ dig _github-pages-challenge-USERNAME.example.com +nostats +nocomments +nocmd TXT
bash: dig: command not found
I received a similar error message when I tried using microsoft’s built in cmd prompt, so I was scratching my head trying to figure out what went wrong and did some digging.
I looked around and found out that a dig command (domain information groper) is a tool that performs DNS lookups and displays answers that are returned from the queried name servers. Its mostly used by DNS admins to troubleshoot DNS problems. One of the steps Github uses to verify your ownership of the domain name is that they have you create a txt record in your DNS configuration. Github sends a command to the server and a txt response comes back. Not exactly my area of expertise, but I understood how this works for verification. Since it can take configurations up to 24 hours to update, the dig command lets you check on your own iof the configuration has been changed so you can verify your domain. Otherwise, you get an error message from Github when trying to verify on their site.
We were unable to verify ownership of YOURSITE. We couldn't find the TXT record. Note that DNS changes can take up to 24 hours.
I didn’t necessarily need to do a DIG command since I could just wait for the update but of course I was curious and wanted to be able to do one now.
So how do you add it?
1 - Download a open source BIND 9 tool from the Internet Systems Consortium (ICS). For windows users, make sure you download BIND 9.16.48 as the current version (9.18.24) does not support Windows.
2 - Once downloaded, extract the zip file content into a folder on your computer (I did it on my desktop)
3 - Run the BindInstaller.exe file as an administrator, and make sure you choose the Tools Only option. I used the default target directory (C:\Program Files\ICS BIND 9), but you can change it if needed.
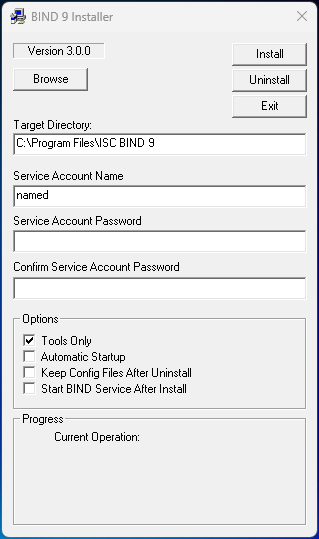
4 - Once you click on the install button, the installer will prompt you that the directory does not exists and asks if you wish to create it (click yes)
5 - The installer will ask you if you want to install Microsoft Visual C++ 2017 Redistributable. This is not necessary so you can ignore it by clicking Close. It will ask you if you are sure and you can click yes to confirm you do not want to install it.
6 - Next, the system will prompt you with an installation complete message.
You will now have to add the path of the ICS BIND 9 folder (C:\Program Files\ICS BIND 9\bin) to the system PATHS variable
7 - In your windows search bar, enter “system environment” in the results you’ll see “Edit the system environment variables”.
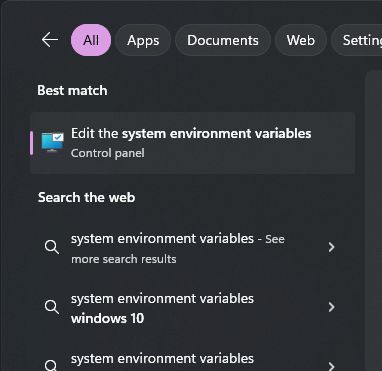
8 - Click on it to open up system properties (advanced tab)
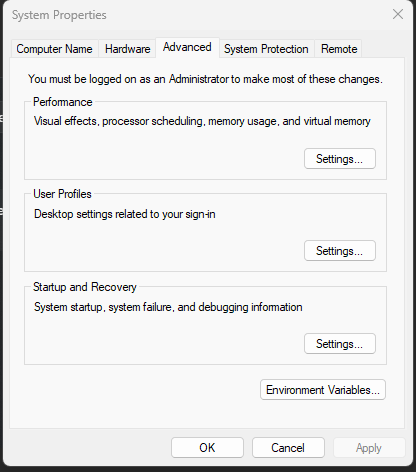
9 - Click on Environment Variables to open the Environmental Variables Window
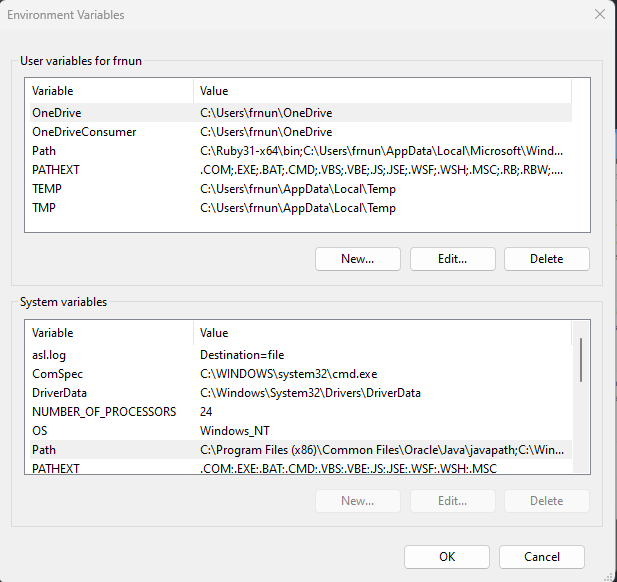
10 - Double click on the Path variable to edit the environment variables. a new window will open to allow you to edit the variable.
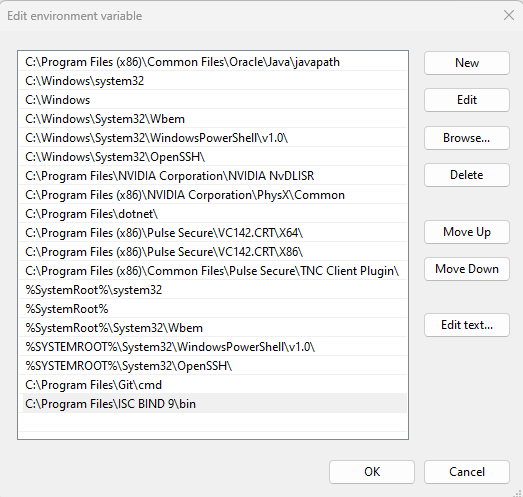
11 - Click on new and enter the path (C:\Program Files\ICS BIND 9\bin). Click on the OK button to close the Edit Variables window, Ok again to close the Environment Variables window, and OK one final time to close the Systems Properties Window.
12 - Now enter your command prompt of choice and enter your dig command and you should receive information on your DNS similar to the snippet below (I only pasted a portion since it is quite long)
$ dig

; <<>> DiG 9.16.48 <<>>
;; global options: +cmd
;; Got answer:
;; ->>HEADER<<- opcode: QUERY, status: NOERROR, id: 7674
;; flags: qr rd ra; QUERY: 1, ANSWER: 13, AUTHORITY: 0, ADDITIONAL: 27

;; OPT PSEUDOSECTION:
; EDNS: version: 0, flags:; udp: 1232
; COOKIE: 806aee20bb6776fa930337bf65d904138d156713a1b1f810 (good)
;; QUESTION SECTION:
;.                              IN      NS

;; ANSWER SECTION:
.                       443602  IN      NS      c.root-servers.net.
.                       443602  IN      NS      d.root-servers.net.
.                       443602  IN      NS      j.root-servers.net.
Now you can use your Github pages dig command to see if your site is ready. Hopefully it is and you’re ready to get verified!


